I recently shared with you our 3D Spring Flower suncatcher we made together. We had some flowers left over from doing this, so I decided we'd make a few 2D versions. To make them, you'll need some sticky-back plastic, some coloured card or foam and some Spring flowers/leaves/petals.
I started by cutting out some 2D shape outlines out of foam. You could use card for this but I felt foam was a bit thicker and less flimsy. I then cut out sections of sticky-backed plastic big enough to fit the outlines onto and then stuck them on.
Tommy then set about arranging his flowers and leaves on top, pressing them down firmly to ensure they stuck to the plastic. I then sealed the pieces of artwork by adding a layer of sticky-backed plastic on the top and cut off any excess.
Again, I'm really pleased with how these have turned out. They've really brightened up our window and I'm hoping because they're sealed they'll last a little longer than our 3D version. I'd kind of like them to be up on the window for a while!
Showing posts with label nature. Show all posts
Tuesday, 12 May 2015
3D Spring Flower Suncatchers
I have soooooo much love for the Spring season. Everything just seems to be bursting into life and so bright and colourful at the moment. It really is one of my favourite times of the year. We've been taking some time out from what we normally do over the last few weeks, after a difficult time we've had recently and we've been trying to take our mind off things by going out and enjoying the nicer weather. So I've been quite quiet and not posted much on here in the way of craft/play activities because we haven't really done much at all since Easter.
I've always seen it as really important for children to see beauty in what is around them and to appreciate nature. It's something I always try to instill in Tommy and I will aim to do the same with Isla. Life is usually ridiculously busy, with little time to stop and look at what is around where you live or work. Children are constantly surrounded by toys and technology and it's nice to get away from this now and again, to experience some quiet time, to appreciate the environment and reflect on how lucky we are to live where we live. I definitely want our children to value and appreciate everything, particularly the things in life that are 'free' rather than commodities. I want them to get as much (or perhaps more) out of a walk on the beach or in the woods as they would do if we were to take them to Alton Towers. If we 'sell' these things as exciting, they will see them as such.
With this in mind, I wanted to create something that was a reflection of everything that was going on in the environment around us, something that would draw attention to the changes that had been happening as we had entered the season of Spring. We decided on a walk to collect 'evidence' of Spring - buds, blooms, different colours, blossom, leaves, greenery, anything really that suggested growth or new life. We found a large bucket and took it on a local walk around the village, through the park and the woods to collect our materials. There were no rules as to what went in the bucket, as long as it wasn't picked or pulled off a plant/tree. It's been extremely windy here over the last few weeks, so it just wasn't necessary to resort to picking flowers. We did take a few petals or flowers off the plants in our own garden though.
I didn't imagine this walk would be quite the hit it turned out to be. I encouraged Tommy to find as many different colours as he possibly could because our aim was to create a beautiful, colourful piece of art, and it was a challenge he couldn't resist. I also encouraged him to try and find a range of different kinds of materials, from spiky ones to smooth ones, from large-flowered ones to small-flowered ones, from fern-like leaves to broad ones and this really motivated him. We talked about the different plant names as we came across them and I was surprised to learn how much Tommy knew already.
Once we had collected a variety of leaves, flowers, blossom and petals, we returned home and then looked for ideas as to what to do with them. On Pinterest, I stumbled upon the idea of producing a 3D suncatcher. It was the perfect idea for making a piece of art out of our natural materials so we set about making it immediately.
To make it, you need a small cardboard box, some sticky-backed plastic, a collection of natural materials and some paint (optional). The box needs to be quite strong if you intend to paint it like we did.
First of all, we cut an aperture out of each side of our suncatcher, leaving a centimetre border around the edges. We cut the top off the box and then painted it white to make it look a little more attractive. The next step was to stick the sticky-backed plastic, with the sticky side facing outwards, onto the inside of the box's sides. Then Tommy carefully placed his leaves and flowers onto the sticky-backed plastic. Some of the leaves/flowers stuck better than others. The best tip I can offer is that the smaller they are, the better they will stick to the plastic. Try to create interest by sticking a variety of plants onto each side. To finish the suncatcher off, you could then cover each side with a further piece of sticky-backed plastic, to sandwich in your flowers/plants and stop them from dropping off. We didn't bother with this step, as I felt it looked just right as it was.
I'm so pleased with how this project turned out. The suncatcher is just so beautiful - it captures the sunlight so wonderfully and looks as though every single tiny piece was carefully and perfectly-placed, even though in reality it was just whacked on! I love how very different it looks from each side.
I know it won't last very long unfortunately, as the flowers will die quickly; I don't know if you could get around this by drying and pressing the flowers beforehand. But I shall enjoy having it on our windowsill in the meantime!
With this in mind, I wanted to create something that was a reflection of everything that was going on in the environment around us, something that would draw attention to the changes that had been happening as we had entered the season of Spring. We decided on a walk to collect 'evidence' of Spring - buds, blooms, different colours, blossom, leaves, greenery, anything really that suggested growth or new life. We found a large bucket and took it on a local walk around the village, through the park and the woods to collect our materials. There were no rules as to what went in the bucket, as long as it wasn't picked or pulled off a plant/tree. It's been extremely windy here over the last few weeks, so it just wasn't necessary to resort to picking flowers. We did take a few petals or flowers off the plants in our own garden though.
I didn't imagine this walk would be quite the hit it turned out to be. I encouraged Tommy to find as many different colours as he possibly could because our aim was to create a beautiful, colourful piece of art, and it was a challenge he couldn't resist. I also encouraged him to try and find a range of different kinds of materials, from spiky ones to smooth ones, from large-flowered ones to small-flowered ones, from fern-like leaves to broad ones and this really motivated him. We talked about the different plant names as we came across them and I was surprised to learn how much Tommy knew already.
Once we had collected a variety of leaves, flowers, blossom and petals, we returned home and then looked for ideas as to what to do with them. On Pinterest, I stumbled upon the idea of producing a 3D suncatcher. It was the perfect idea for making a piece of art out of our natural materials so we set about making it immediately.
To make it, you need a small cardboard box, some sticky-backed plastic, a collection of natural materials and some paint (optional). The box needs to be quite strong if you intend to paint it like we did.
First of all, we cut an aperture out of each side of our suncatcher, leaving a centimetre border around the edges. We cut the top off the box and then painted it white to make it look a little more attractive. The next step was to stick the sticky-backed plastic, with the sticky side facing outwards, onto the inside of the box's sides. Then Tommy carefully placed his leaves and flowers onto the sticky-backed plastic. Some of the leaves/flowers stuck better than others. The best tip I can offer is that the smaller they are, the better they will stick to the plastic. Try to create interest by sticking a variety of plants onto each side. To finish the suncatcher off, you could then cover each side with a further piece of sticky-backed plastic, to sandwich in your flowers/plants and stop them from dropping off. We didn't bother with this step, as I felt it looked just right as it was.
I'm so pleased with how this project turned out. The suncatcher is just so beautiful - it captures the sunlight so wonderfully and looks as though every single tiny piece was carefully and perfectly-placed, even though in reality it was just whacked on! I love how very different it looks from each side.
Tuesday, 14 April 2015
Forest Floor Small World Play
As you may have guessed, we love a bit of small world play in the Collingwood household. Following on from the success of our rockpool small world, I thought we'd make another one, this time with a forest theme. Whenever you make a small world, I think it's important to already own a lot of the 'stuff' needed to make one. It's no good trying to make a small world farm spontaneously, for instance, and then realise you only have one cow and a sheep. One cow and a sheep does not a farm make. I try and collect things I might find useful as I go, as I see them and this makes things much easier when you eventually do get round to setting a small world up. This is why I chose a forest theme - having a young boy who is fascinated by insects and bugs, we already had a sizeable collection of plastic ones.
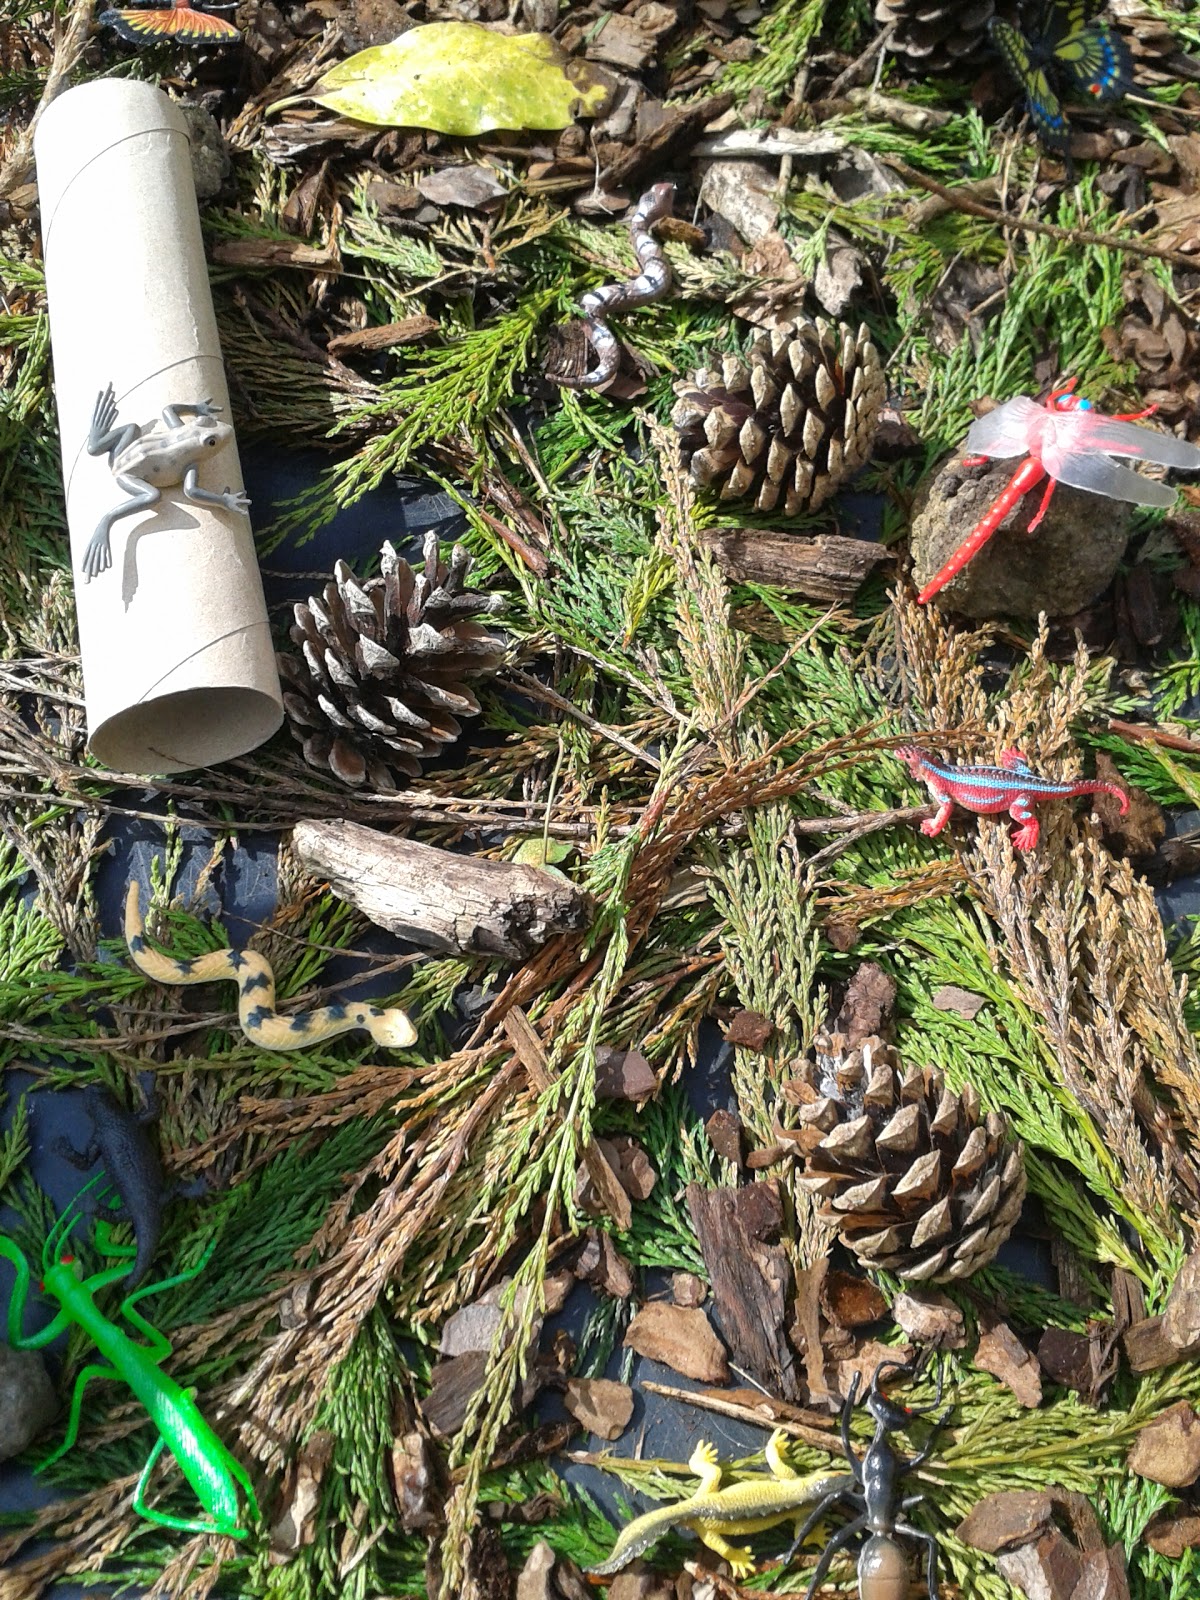
To make the 'forest', I used lots of pine cones and twigs, bark and conifer trimmings I collected from the floor of our local maze (yes, really!). I added some toilet roll tube 'logs' and a collection of stones/ rocks from the garden for creatures to hide in and under.
The animals were two sets of Animal Planet plastic animals (an insects/bugs one and a snakes, lizards and frogs one).
During our play, we talked about camouflage and the idea of predators and prey, habitats and species. We played hide and seek with the animals, which was really tricky considering the colour of the creatures and their 'habitat.' I'd love to hear your ideas for small world play you've tried.
To make the 'forest', I used lots of pine cones and twigs, bark and conifer trimmings I collected from the floor of our local maze (yes, really!). I added some toilet roll tube 'logs' and a collection of stones/ rocks from the garden for creatures to hide in and under.
The animals were two sets of Animal Planet plastic animals (an insects/bugs one and a snakes, lizards and frogs one).
During our play, we talked about camouflage and the idea of predators and prey, habitats and species. We played hide and seek with the animals, which was really tricky considering the colour of the creatures and their 'habitat.' I'd love to hear your ideas for small world play you've tried.
Friday, 28 November 2014
A Trip to the Donna Nook National Nature Reserve
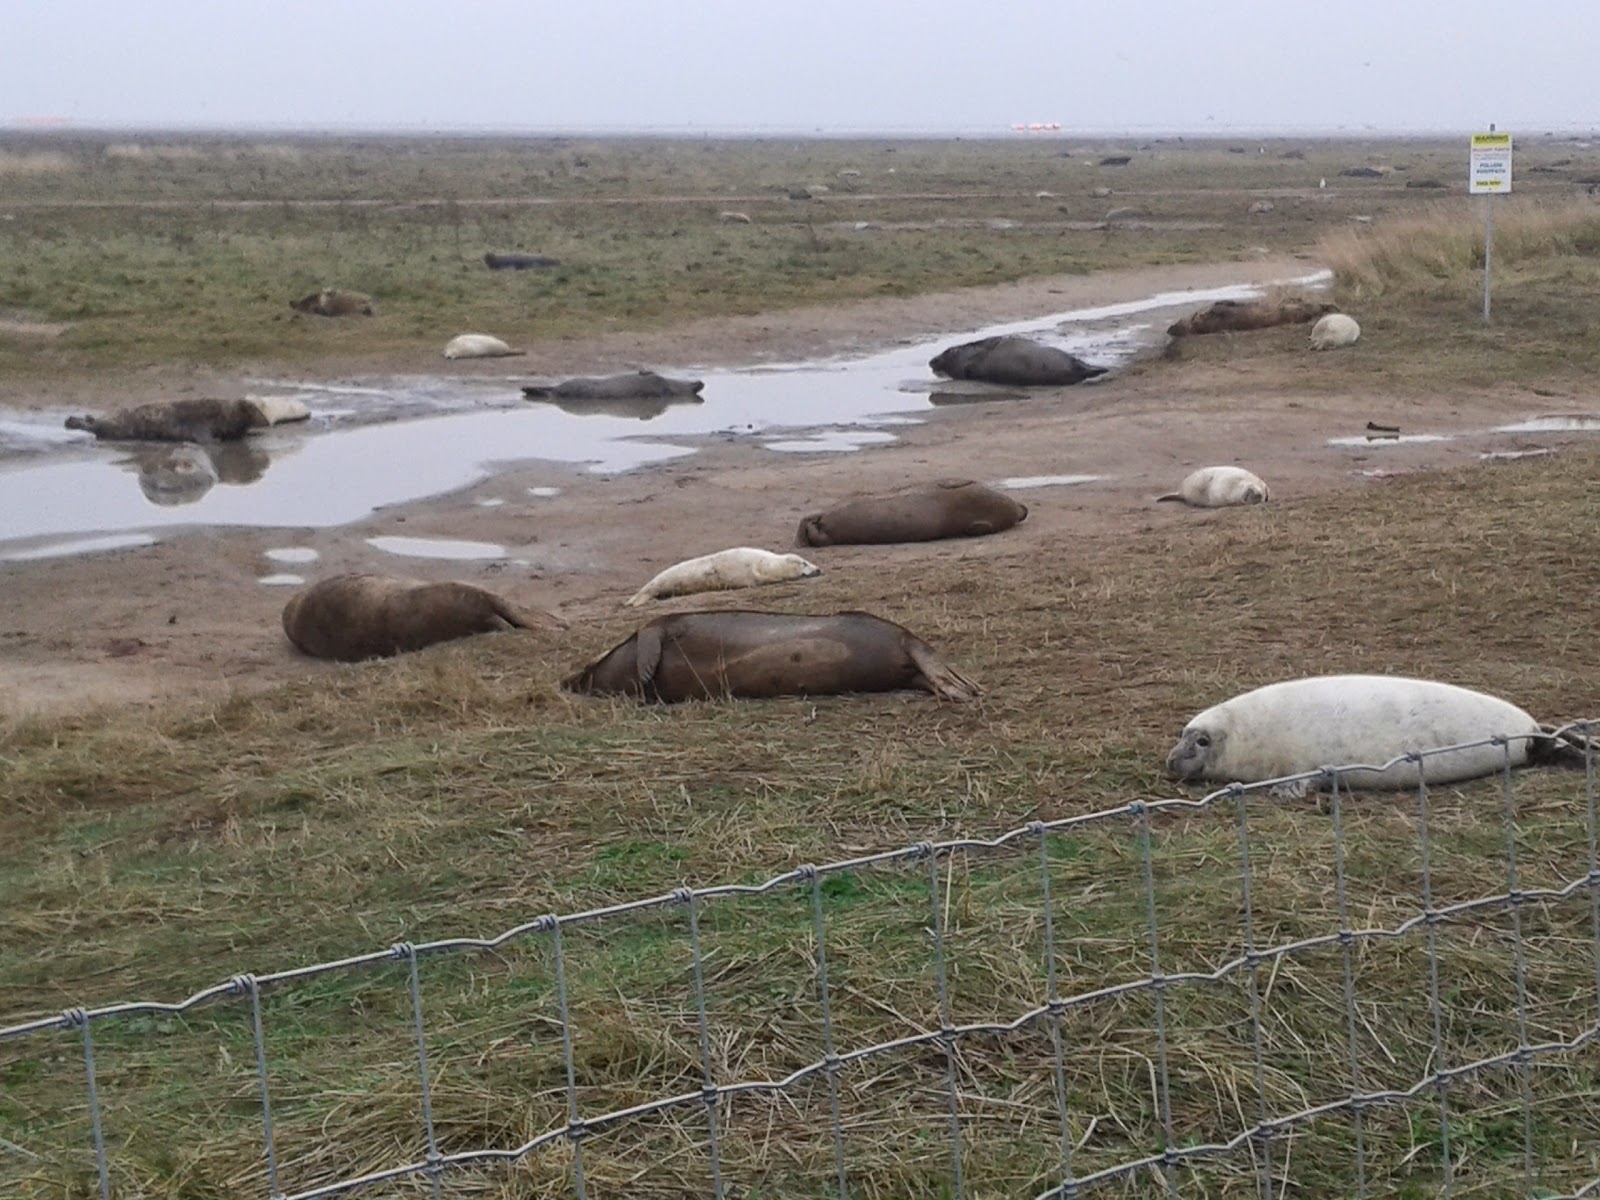
November sees the return of our annual day trip to the Donna Nook National Nature Reserve in Lincolnshire, not far from where we live. The reserve is home to one of only four large colonies of grey seals in the British Isles and because of this it attracts tourists from all over the UK. Usually these animals spend most of the year out at sea but during the months of November and December, they come up onto the sandbanks at Donna Nook to breed and to give birth to their pups. They are only around for a short while and they are a must see if you live in Lincolnshire. The viewing area is open from late October to December but the best time to see the most pups seems to be towards the end of November/beginning of December. It allows you to get close enough to the seals to be able to touch them (although you shouldn't and wouldn't want to!)
We take Tommy every Winter to see the seals at Donna Nook and this year we had our newborn in tow too. The walkways at the reserve are relatively flat, so suitable for buggies but there is quite a climb up over the sandbanks before you get there and it can get extremely busy so do bear this in mind. We opted to use a baby carrier instead and Isla was more than happy to watch the seals from there.
The reserve itself is very low key, as it should be. It consists of two little huts, one at each end, that gives visitors information about the seal colony and allows visitors to make donations or buy a small selection of gifts. Information plaques along the way are fun, children-friendly and encourage you to find out more about grey seals and the work that the nature reserve conducts. It has two car parks at either end of the walkway and is £2 to park for however long you want to be there.
We visited the reserve on a rather mild day and we spent quite a while there. It does get very cold and windy on this part of the coast, as it's very exposed to the elements and there is little shelter so if you do go, be sure to wrap up warm! If you do need warming up, there is a handy hot food and drinks van where you can get a Lincolnshire sausage in a bap or a hot chocolate. This we found to be very welcome indeed!
I would really recommend a trip to the Donna Nook Nature Reserve if you haven't been already. There aren't many places in the UK where you can observe wild animals as closely as you can do here, and rare ones at that. It's a super place to visit if you are interested in these animals or you enjoy wildlife photography. It really is a spectacle that both of my children enjoyed. It's cheap, educational and a great place to visit if you don't mind getting a little chilly in the process!
Subscribe to:
Posts (Atom)