Sunday 26 July 2015

Our Summer Bucket List - ice dinosaur eggs

Tommy has been obsessed with dinosaurs ever since I can remember, so when I stumbled upon this activity a while ago, I knew we just had to try it. It's an activity that's perfect for doing in the garden on a hot summer's day so it was definitely going to be featuring in our Summer bucket list. It doesn't have to be done with dinosaurs - mini toy cars, small figurines, numbers, letters - whatever you like - can be encased in ice.

To make these eggs, I carefully inserted each dinosaur into an ordinary balloon. I thought water balloons would work best for this but I couldn't get it to work. Water balloons were just far too thin and ripped easily when I tried to insert the dinosaurs. Ordinary balloons were much stronger and didn't rip or puncture. Once the dinosaur was fully inside the balloon, I filled it with water, tied a knot in the end and out it in the freezer overnight. When we were ready to do the activity, I cut the balloons away from the ice and placed them all in a box.


I provided Tommy with chisels and hammers to help break the ice and pipettes and squeezy bottles and a bowl of warm water. He then set to work trying to free each dinosaur from their ice egg. He wore some safety goggles to do this (well swimming goggles actually, but they protected his eyes as he worked nevertheless!)


I was surprised at just how long Tommy sustained concentration during this activity. The good thing about it is that it WILL take them ages to free their items so they will be occupied for quite a while and you can just leave them too it. We'll be sure to repeat this activity again, perhaps with some small figurines. I can only hope it will be as big a hit as it was when we did it the other day!

Saturday 25 July 2015

Our Summer Bucket List - bubble painting

I have absolutely NO idea why we haven't done bubble painting at home before. It's been an activity I've had 'pinned' for years but just completely forgotten about until Tommy came home from nursery the other day. He isn't usually very forthcoming when it comes to sharing what he has been doing at nursery. So on the occasions when he does start to tell me about his day, I know he'll have done something really exciting. Tommy was so excited to tell me all about his bubble painting activity and went into giving me a detailed set of instructions as to how it is done. As it was something I've wanted to do for ages and something Tommy really enjoyed, we decided to add it to our Summer bucket list.

We had a lovely warm, sunny day the other day so we took the opportunity to do this. Ideally, bubble painting does need to be done outside or, at the very least, in an area of your house that isn't carpeted. It isn't hugely messy but there is the temptation to go really crazy with the bubbles (as Tommy did!) and it absolutely has to be done!

I set up a table with paints, paper and the ingredients needed to make the bubble mixture. I used plastic cups to make each colour, as it saved on having to clear up later. I love messy activities, but I like to keep any preparation and cleaning-up to an absolute minimum.


To make the bubble mixture, I poured poster paint into a cup to a depth of about 1cm. Using enough paint is key to the process and impact of the finished piece of artwork. If you don't use enough paint, the colour will be too diluted and end up not making a print on the paper. I added some washing up liquid to the cup and topped it up with water and then mixed the ingredients together with a spoon. I tried a test print at this point to make sure the mixture was frothy enough to bubble up and I had used enough paint to make a bright print.

To make your artwork, you simply put a straw in your cup and continue to blow through it until the bubbles reach over the top of the cup. You then place your paper gently over the bubbles to make your print and then repeat with lots of different colours.


We did this activity twice in one day and did it again a few days later using the same bubble paints. Bubble painting is so quick and easy to do, sooooooo much fun and the resulting piece of artwork is really beautiful too. We were really delighted with ours.


Friday 24 July 2015

Shark and turtle paper plate crafts

We are really trying to make headway with our Summer bucket list we wrote earlier this week. You can find it here, if you haven't seen it already. One of our most special days out was a trip t the local aquarium. We've never really had a local aquarium as such - the nearest used to be over an hour's drive away, which is pretty poor considering we live just five miles away from the coast. This summer however, we were delighted to discover a new aquarium was opening in Skegness, not far form where we live. As it wasn't a particularly great day weather-wise yesterday, coupled with the fact Skegness isn't especially busy yet, we decided to visit for the afternoon. I'll be writing a post about our trip there soon, so look out for it, particularly if you live nearby.

Anyway, our trip to the aquarium renewed Tommy's interest in sea creatures. He's always loved learning about them and when he was about two he loved nothing more than watching David Attenborough documentaries. He's DEFINITELY my child! Today was a particularly grim day, so we couldn't do much in the way of outdoor play so we decided to do some crafting instead. Using the ocean as our theme, I asked Tommy what creatures he'd like to try and create and eventually, after much deliberating, we decided on sharks, turtles, jellyfish and octopuses.

I was quite confident that we could make one of each in one afternoon but that was never going to happen, so we just got round to making the shark and turtle. To make the shark, we used paper plates, paint, card, glue and cellotape.

We started by painting the top half of the paper plate grey and then cut fins out and painted those before leaving them to dry. We then cut a semi-circle out of red card and glued it onto the white half of the paper plate. Google eyes were then added and we used white card to make the teeth.


To make the turtles, I cut squares of corrugated cardboard, tissue paper, foam, crepe paper and card and then we glued these on to the paper plate We cut out a head and fins and cellotaped them onto the back before adding google eyes and some glitter on the fins and head. 


Both crafts were super easy to make, requiring us only to use a few materials and super cute!!! 

DIY ribbon and lace box

It was on holiday that I got the idea for making one of these. Isla is obsessed with laces, labels and tags at the moment (as I'm sure any child her age is). She spends ages playing with them, pulling them, turning them over, waving them in her hands. She just finds them fascinating. Let's face it though, a cord of any kind presents a hazard to children and so, with this in mind, I wanted to make Isla something with ribbons and laces that would actually be safe for her to play with.

To make her 'toy', I used an old shoe box, offcuts of wrapping paper, a variety of colourful laces and ribbons, scissors, cellotape, a knife and a pen. It's better to use a lidded box with a lid that can be completely removed, as this makes it easier for threading the laces and ribbons later on.


I started by covering the shoe box in the wrapping paper. It helps to make a rough net first so that the paper fits neatly around the box. I then used a pen to make holes in the sides and ends of the box and threaded laces through. Once the laces were through each side, I made a large knot at each end so that Isla could pull the laces out slightly but not enough to pose a danger. I should mention at this point that with anything like this, babies should not be left to play unsupervised anyway.


For the ribbons, I used a small sharp knife to cut a slit in the sides of the box and threaded them through. When using the pen/knife to make holes in the box, it helps to wiggle them slightly to increase the size of the holes and this will make it much easier when it comes to threading your materials through. At this point, you could also put some jingle bells (or something noisy) inside the box to make it more multi-sensory. I didn't bother with this though.


I wasn't really sure how well this 'toy' would be received to be honest. Usually when I take lots of time to make something for Isla, it doesn't take long before it's shoved aside in favour of something completely ordinary. However, I was delighted to see her engaging with it for a lot longer than I expected. It's been out on a few occasions since.


A box like this is fantastic for developing a whole host of skills, including concentration, fine-motor skills and problem-solving ability. Making a toy can be a bit soul-destroying when you realise actually they're not so keen on playing with something you've spent a lot of time making and put a lot of thought into. In this case though, my hard work paid off and we've been using the box regularly ever since.

Have you made any DIY toys for your baby before? If so, I'd love to hear your ideas if you have.

Tuesday 21 July 2015

Our Summer Bucket List 2015

It's finally beginning to dawn on me that I'll be losing my 'baby' in September when he goes off to school for the first time. I always knew it would be coming this year and yet, somehow, I'd pushed it to the back of my mind because I can't quite frankly begin to contemplate not having Tommy around every single day like I'm used to. Yes. I KNOW school will only be from 9am til 3pm. Yes. I KNOW there are weekends, holidays and, with me being lucky enough to be a teacher, I KNOW we will be spending weeks and weeks of the year together. Yes. I KNOW for three days a week I'll be at work anyway, just like I was before I went on maternity leave when I was pregnant with Isla. Yet I just feel so so sad about it all. I'm trying not to dwell too much on it all, trying not to let it get to me and this is really what has prompted me to come up with a bucket list for the summer holidays - somethin to positive to focus on, rather than dwelling on my thoughts.

As I've just mentioned, we will always spend the summer holidays together, so every year there will be lots of opportunities for fun outings, activities and crafts but I kind of wanted to make this summer one to remember and one that would give Tommy a final 'push' in preparing him for big school. Another reason for compiling a summer bucket list is to really make sure we start and make the most of those precious six weeks together, rather than getting to the end and thinking "what did we really do/achieve during that time?" Six weeks seems such a long time but every single year it flies by - the "back to school" signs are up in the shops before the end of the school year and before you know it, you're back in your classroom introducing yourself to your new class. 

There are a huge number of summer bucket lists on Pinterest or on the Internet, that many that I just didn't know where to start. So instead I scrapped the idea of looking for the most perfect existing list and just wrote my own. our list includes a combination of some really special places to visit, lots of things that we do every week anyway, activities led by Tommy's interests, things Tommy has mentioned he'd like to do but we haven't got round to and simple craft projects. 

I was also faced with the dilemma of where to write our list. I initially thought about writing it all on a large chalkboard but I was worried about presenting it nicely enough, having enough space on the board to fit everything in, items getting rubbed off or not having any space left to write additional ideas on (I know, I got waaaaaaay too into this at one point!) Eventually, I decided on a (nice and easy!) jam jar with each activity written on a lollipop stick. I've also included some extra blank lollipop sticks should anything else spring to mind. 

So here is my list. It won't be suitable/doable for everyone but it might give you some ideas as to what to include if you are considering making a summer bucket list yourself. My advice is just to pick things that you can easily achieve, places that you can easily get to, some extra-special treats and things that will allow you as a family to spend quality time together. The teacher in me always seeks to find opportunities for different areas of learning too, so you might want to consider this. 

Our Summer Bucket List

1. Go pond-dipping
2. Water balloon painting
3. Go on a pedalo
4. Feed the ducks
5. Make fruit kebabs
6. Make homemad pizzas
7. Fly a kite
8. Paddle in a stream
9. Garden safari
10. Make a den
11. Buy 1st pair of school shoes
12. Go berry-picking
13. Make ice-lollies
14. DIY water wall
15. Floating/sinking experiment
16. Moon/cloud dough
17. Ball-pit balls in the paddling pool
18. Make bird-feeders
19. Go bug-hunting
20. Look for shapes in the clouds
21. Make an ice-cream factory
22. Buy school uniform
23. Paddle in the sea
24. Build a sandcastle
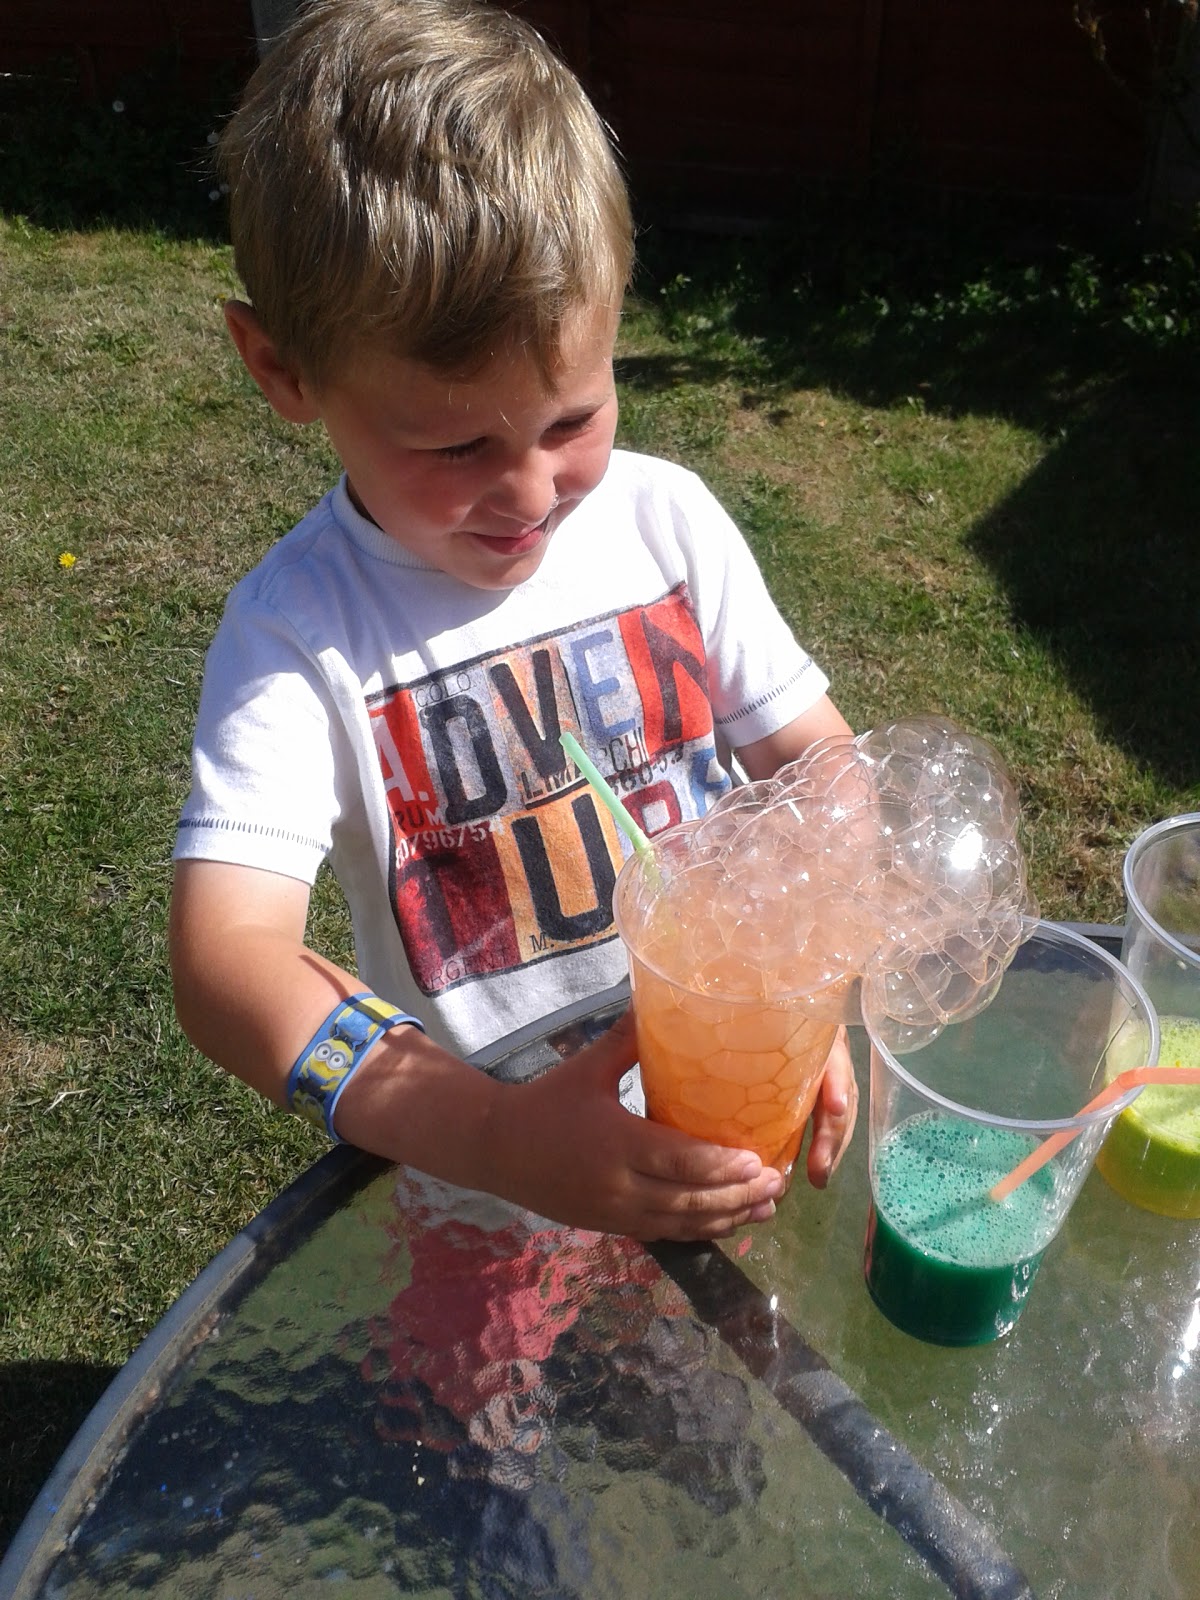
25. Bubble-painting
26. Visit the aquarium
27. Wash the car
28. Ride bike without stabilisers
29. Play crazy golf
30. Ice dinosaur eggs
31. Picnic in the park
32. Water balloon fight
33. Make an obstacle course in the garden
34. Ride a donkey on the beach
35. Visit the farm
36. Play at a splash pad
37. Visit the zoo
38. Face painting
39. Trip to the beach
40. Find our way through a maze

I'm sure we'll think of many more to add to the list. If you can think of anything else, please let me know of anything I've missed. I'd love to hear what makes the summer holidays special for your family. 

I've typed up our list on the laptop, so that I can glance at it in the morning or discuss it with Tommy in order to help to decide what we might do on a particular day. This will be more helpful trying to rifle through the lollipop sticks to find something appropriate! I'm hoping that this list of activities is realistic and achievable. If we do manage to do all of these things, I'm sure it will make for a fantastic summer holiday. Happy holidays everyone!